Getting Started
This guide describes how to get started with Katib and run a few examples.
Prerequisites
You need to install the following Katib components to run examples:
Getting Started with Katib Python SDK
You can run your first hyperparameter tuning Katib Experiment using Python SDK.
In the following example we are going to maximize a simple objective function:
$$ F(a,b) = 4a - b^2 $$
The bigger \(a\) and the lesser \(b\) value, the bigger the function value \(F\).
If you install Katib standalone, make sure that you
configure local kubeconfig
to access your Kubernetes cluster where you installed Katib control plane.
If you install Katib as part of Kubeflow Community Distribution (KCD), you can open a new Kubeflow Notebook to run this script.
Note. If you use Katib within KCD to run this example, you need to use this
namespace: KatibClient(namespace="kubeflow-user-example-com").
Note. The kubeflow namespace is pre-configured with the required label
katib.kubeflow.org/metrics-collector-injection: enabled for metrics collection. If you want to use pull-based metrics collector
in other namespaces, you can attach this label following the instructions in the
Metrics Collector.
# [1] Create an objective function.
def objective(parameters):
    # Import required packages.
    import time
    time.sleep(5)
    # Calculate objective function.
    result = 4 * int(parameters["a"]) - float(parameters["b"]) ** 2
    # Katib parses metrics in this format: <metric-name>=<metric-value>.
    print(f"result={result}")

import kubeflow.katib as katib

# [2] Create hyperparameter search space.
parameters = {
    "a": katib.search.int(min=10, max=20),
    "b": katib.search.double(min=0.1, max=0.2)
}

# [3] Create Katib Experiment with 12 Trials and 2 CPUs per Trial.
katib_client = katib.KatibClient(namespace="kubeflow")

name = "tune-experiment"
katib_client.tune(
    name=name,
    objective=objective,
    parameters=parameters,
    objective_metric_name="result",
    max_trial_count=12,
    resources_per_trial={"cpu": "2"},
)

# [4] Wait until Katib Experiment is complete
katib_client.wait_for_experiment_condition(name=name)

# [5] Get the best hyperparameters.
print(katib_client.get_optimal_hyperparameters(name))
You should get similar output for the most optimal Trial, hyperparameters, and observation metrics:
{
  "best_trial_name": "tune-experiment-nmggpxx2",
  "parameter_assignments": [
    {
      "name": "a",
      "value": "19"
    },
    {
      "name": "b",
      "value": "0.13546396192975868"
    }
  ],
  "observation": {
    "metrics": [
      {
        "latest": "75.98164951501829",
        "max": "75.98164951501829",
        "min": "75.98164951501829",
        "name": "result"
      }
    ]
  }
}
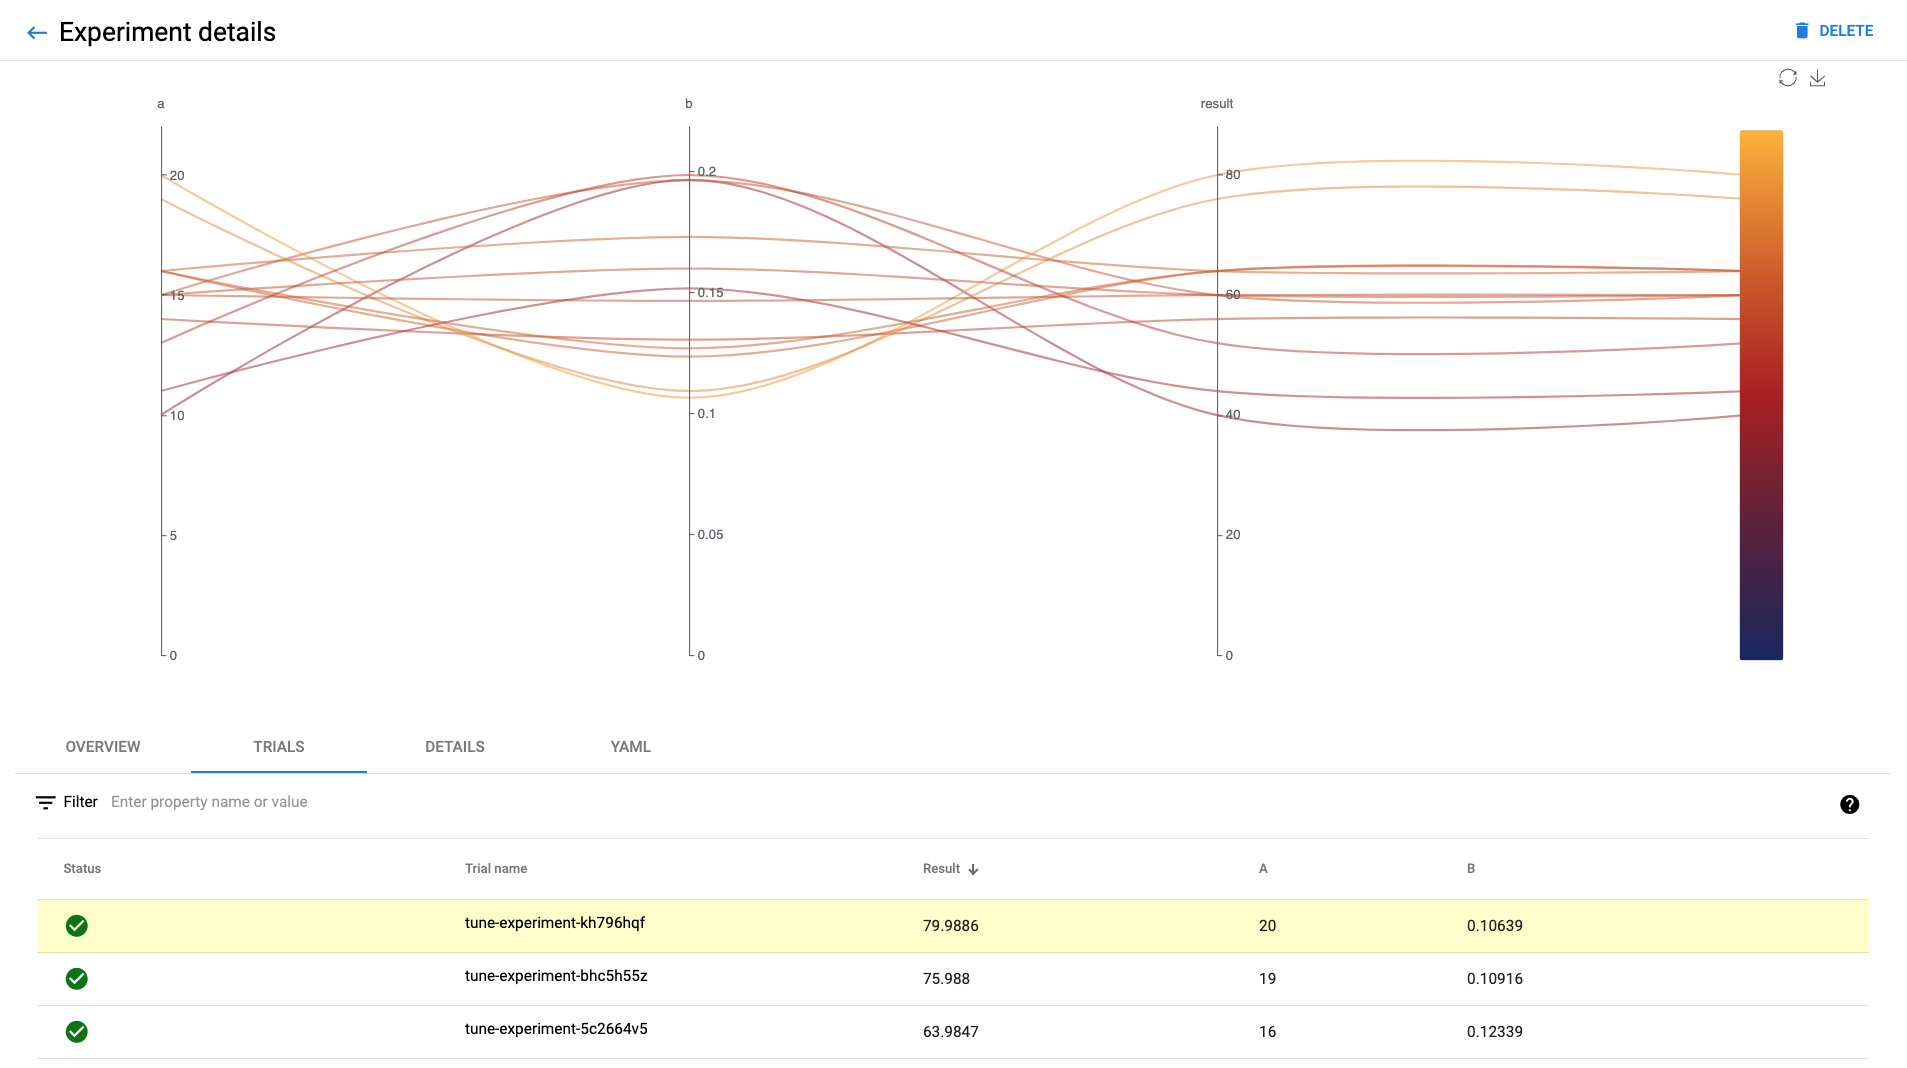
In the Katib UI you should see list of all completed Trials with results:
Next steps
Check the Katib UI guide to get more information about your Katib Experiments.
Run Katib hyperparameter tuning Experiment using YAML.
Learn how to configure Katib Experiment parameters.
Check more Katib Examples.
Feedback
Was this page helpful?
Thank you for your feedback!
We're sorry this page wasn't helpful. If you have a moment, please share your feedback so we can improve.